Showing posts with label cusomiseable. Show all posts

Wednesday, 24 November 2010

3 Column BYO background

Yes, some people asked for it, so here is BYO Background in a 3 column version! Hip hip hooray.

If you're new to this template please read this post about the 2 column version.

In a nutshell: this template is a blank canvas and with a few edits you can fully customise the colour of the header and the background image and it can be easily transformed into something like this......


click above for a live preview


FYI I have used a background from Ollibird and the header image is the 'LightSalmon' header.
The template does not come like this, you have to bring your own background, hence the BYO title.


Coming soon.... a tutorial on how to change the text of the blog header with the Google Font Directory (good idea!)

Saturday, 6 November 2010

BYO Background (use a background image of your choice!)

This is something pretty special!

I have created a pretty generic simple naked template that is waiting for a background image you have or may want to use.

It's pretty simple to do, but in a nutshell: this template is a blank canvas and with a few edits you can fully customise the colour of the header and the background image and it can be easily transformed.

1) Install the template (as per normal):


YES! IT IS COMPLETELY BORING!
(settle down, we'll now jazz it up)

2) Find a background image you'd like to use on your blog. Of course it's your responsibility to make sure it can be used for a personal (or commercial) site.

For this example, I want to use this background by Totally Severe.


{STOP THE PRESS: Just look at some of the freaking amazing backgrounds you can find on Totally Severe here, here and here! I AM IN LOVE!}


3) Download the image, save to your computer. You will need your own image hosting. I like Photobucket. It's free. Whilst Totally Severe seems to already host their images on Photobucket, it's good manners to host images for your own site yourself.

Log into Photobucket (or similar), upload your image and then grab the direct URL address of the image:


4) Put the background image code into your blog.

Go back to blogger and click on the "Design" > "Edit HTML" tabs.

Scroll down the big box of code until you find the /* ---( page defaults )--- *:

*/ /* ---( page defaults )--- */
body {
margin: 0;
padding: 0;
font-size: small;

text-align: center;

color: $textcolor;
background: #CCC url
() repeat fixed;
background-attachment: fixed; }


You will see there are two brackets with nothing in them (in bold red, above)

Paste your direct image link in between the brackets. My code now looks like this:

*/ /* ---( page defaults )--- */
body {
margin: 0;
padding: 0;
font-size: small;

text-align: center;
color: $textcolor;

background: #CCC url
(http://i200.photobucket.com/albums/aa231/free_blogger/redfruit.png) repeat fixed;
background-attachment: fixed; }


Click SAVE.

5) Add your header colour background

In the zip folder you downloaded, you will see a folder called "HeaderImages". Have a look in there and you'll see loads of different coloured header images. They all have curved corners:


(many more colours in the folder)

Pick one you like (or better still, pick on that matches your background image).

Click on the "Design" tab and then "Page Elements".


Follow these instructions (click for a bigger image):


THAT'S IT!

I added the red header image background and this is now how my test blog looks:


(click for a live preview)

Note: you can easily change the header text colour and sidebar bottom border colour by going to LAYOUT > TEMPLATE DESIGNER > ADVANCED. You will be able to change the colours to match your background there.


ALTERNATE HEADER IDEA: Why not take the header image and add your own text in a graphics program to reflect your own header title? It would look fancier this way! ..... then when uploading it select "Instead of title and description". Let me know if you want more info on that but it's pretty simple.


"OK Sharnee, that's amazing now please tell me where to get some awesome backgrounds from!!!!!!!"


SHOW ME WHAT YOU DO! I WANT TO SEE!

Any questions or confusion, let me know!

PS: It's also a good idea to give the artist of your background a link, in the sidebar or footer. Don't forget ;)

PPS: Yeah I know I can't spell cappucino
!

Sunday, 14 March 2010

Excuse Me, I'm Fancy - Blogger Template


(click image above for a live preview)


STOP THE PRESS!

Why not edit the header image and get something a bit spiffier?

I have included the blank .jpg image in the zipped folder so you can add your own title/description in whatever font you like.

This is, in a nutshell, what you have to do:

  1. Open the header image in your graphics program*. Add your own header title text/description. Save this image.

    I came up with this:


  2. Go to LAYOUT > PAGE ELEMENTS and click "Edit" in the header area. You are basically going to tell the blog to show this new image in stead of your boring old plain text header! Click image below for a grab on what to click:


  3. Done!


* You don't need Photoshop (or such) any more because there's something called Pixel Editor which I seem to have within my Firefox Browser. I have no idea if this is now included in Firefox or if I installed the plugin. When I right click on an image, one of the choices is "Edit Image" and when I click that, it brings up a very 'Adobe' inspired editing window:


It looks pretty freaking sweet.

Thursday, 8 October 2009

Opaque Blogger template - XML Template - HIGHLY CUSTOMISABLE (assmuming my instructions make sense!)

Here we have a template that you can use as is, or customise the header (read below for my instructions).  By default the template you download will have a plain text header, so anyone can of course use it.
 
My thoughts are all trying to escape my head at once here, so apologies if the instructions come out slightly garbled.  We have a beautiful wide blogger template that's made of semi-translucent png image files (sorry IE 6 users, you're missing out).

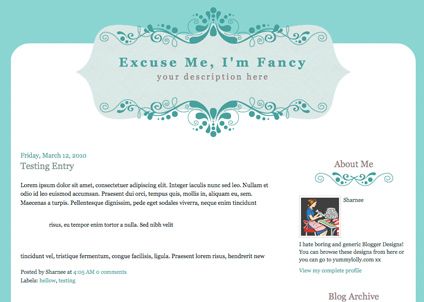
If you install it and use it as it is supplied, it will look like this - ie: it will have a plain text header/description:


click for a larger view


If you would like to use the template as is, download it here:
Download the XML template: here (zip folder)
 
HOWEVER.... if you want to be a little fancier and make your own header image using Photoshop (or similar graphics program), then you can make it look something like the preview site {here}.

Alternatively if you don't know how to make transparent images, they maybe you can make a solid backgrounded header image and the blog could look like this:


click for a larger preview

How do you make your own header image ?


We-ell, first of all I'm going to assume you have Photoshop (or something similar).  You have the option of creating a transparent png or just a normal gif/jpg to insert.  If you chose to go trasparent then you'll need to probably use png24 in Photoshop to make sure the edges are smooth as a baby's bottom.

If you have no idea what I'm talking about, don't worry!

Basically if you want to make your own header image for this blogger template please ensure that the header image is 950px wide for best results.  In the test site {here} my image is 950x193px.  It can be any height you like but 950 is best for width.

OK OK OK, how do I insert this header image I made?

Click on Layout > Page Elements and click on "Edit" in the header area:


(click for a larger view)

Once you click on that, a pop-up window will open:


(click for a larger view)

 Select your image to upload "instead of title and description" and then save.  Done!


SHUTUP LADY and just let me download the freaking template!


Please ensure that you backup your widget data, as installing a new template will wipe/erase your current widget content.
  • To download the xml template: click here
  • Preview the site here
  • Need help installing this? Click here
  •   
    REMEMBER: the template will, by default, come with a plain text header.  Don't worry if you don't want to make a fancy one of your own!

    OMG, WHAT? I don't understand what you're talking about here!


    Sorries.  I guess anyone can use the plain text header template but you're going to have to have a few graphics skillz to make your own header and then insert it.


    PS: Delightful fonts on the test site by Kevin & Amanda <3

    Tuesday, 18 August 2009

    Black n White Elegance - 3 column blogger template

    OK, so the small preview image below looks kind of lame, but if you click on it to preview the site, you'll see that it looks a lot better full size. Also, how awesome do the adsense ads look in there? (I hate it when they never really look quite right!).


    click for a larger preview
    (go on, it looks heaps better bigger!)


    Please ensure that you backup your widget data, as installing a new template will wipe/erase your current widget content.

    Tuesday, 11 August 2009

    Roll Up, Roll Up XML Marquee template

    This is a cross between a movie marquee and a circus theme - perhaps more movie sign marquee moreso than circus (maybe it's just the colours that scream out circus to me?). Whatever it is, I know it's not mega fancy but I hope you like it. xx


    click for a live preview


    The design works with "new" blogger - ie: it's an XML template. Please ensure that you backup your widget data, as installing a new template will wipe/erase your current widget content.